Baby Bunny Crochet Pattern: 11 Adorable Designs
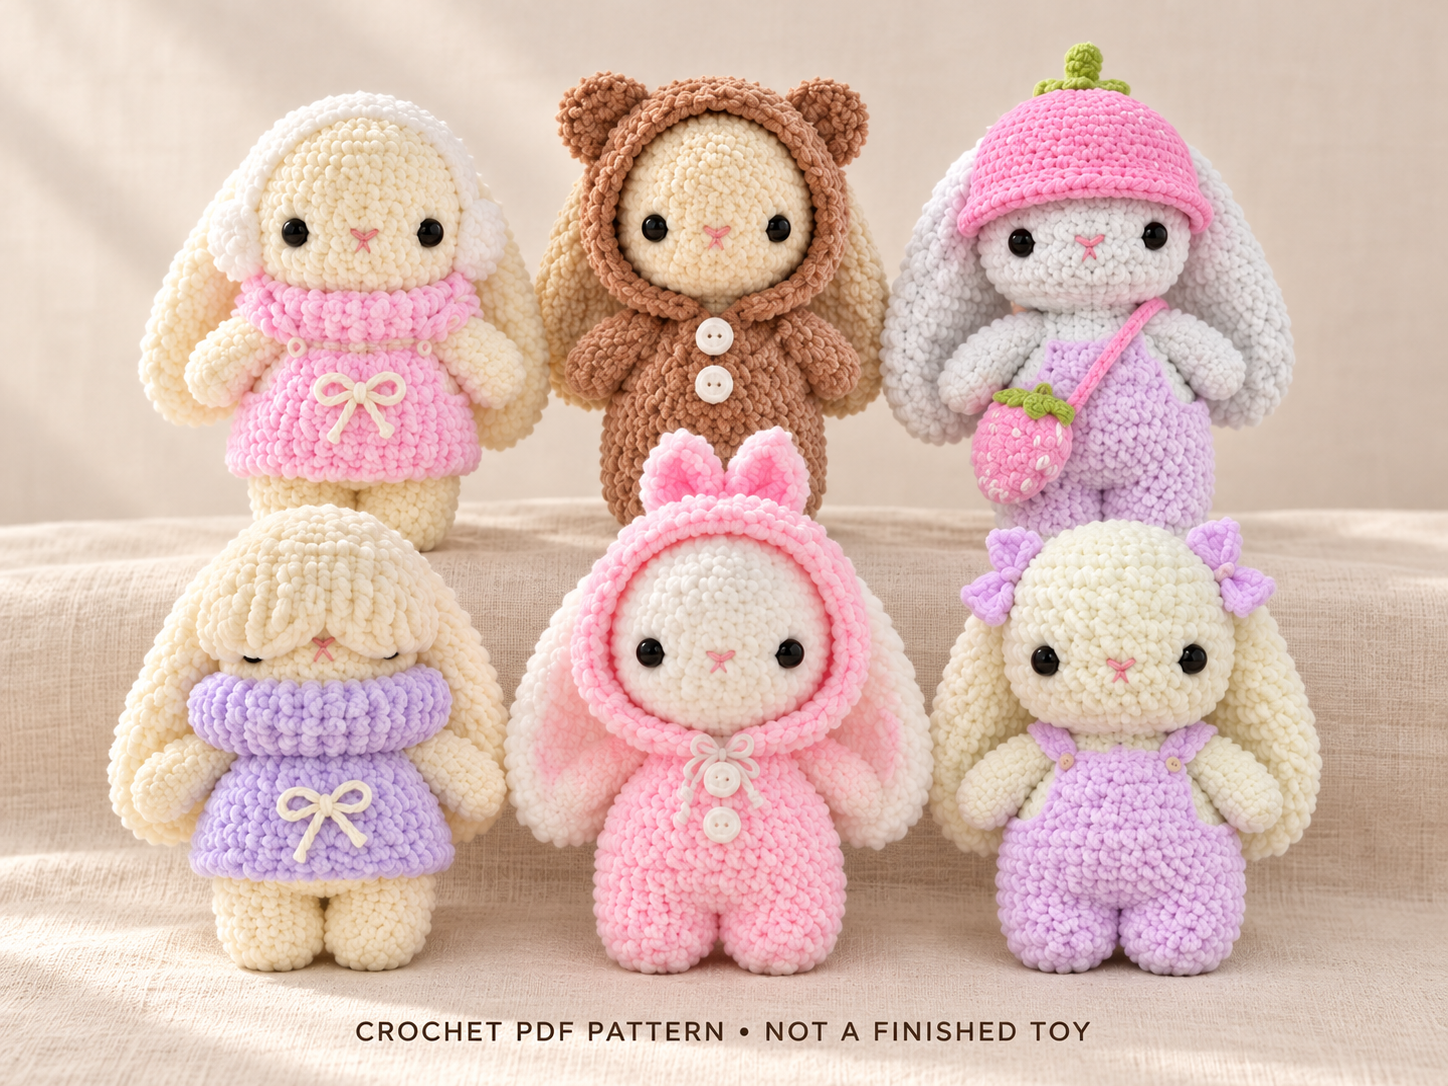
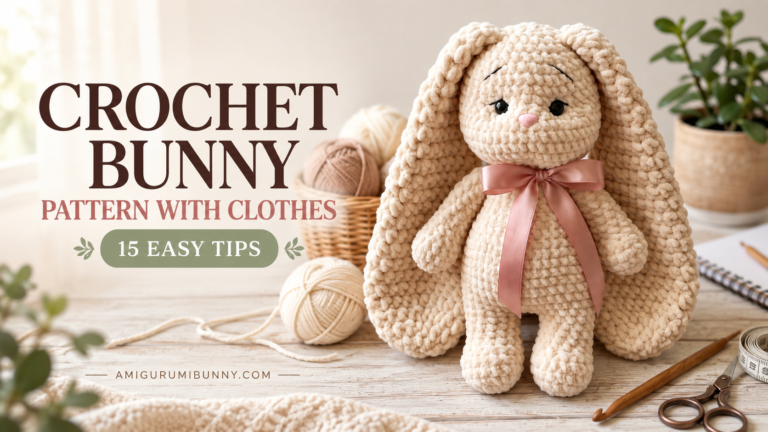
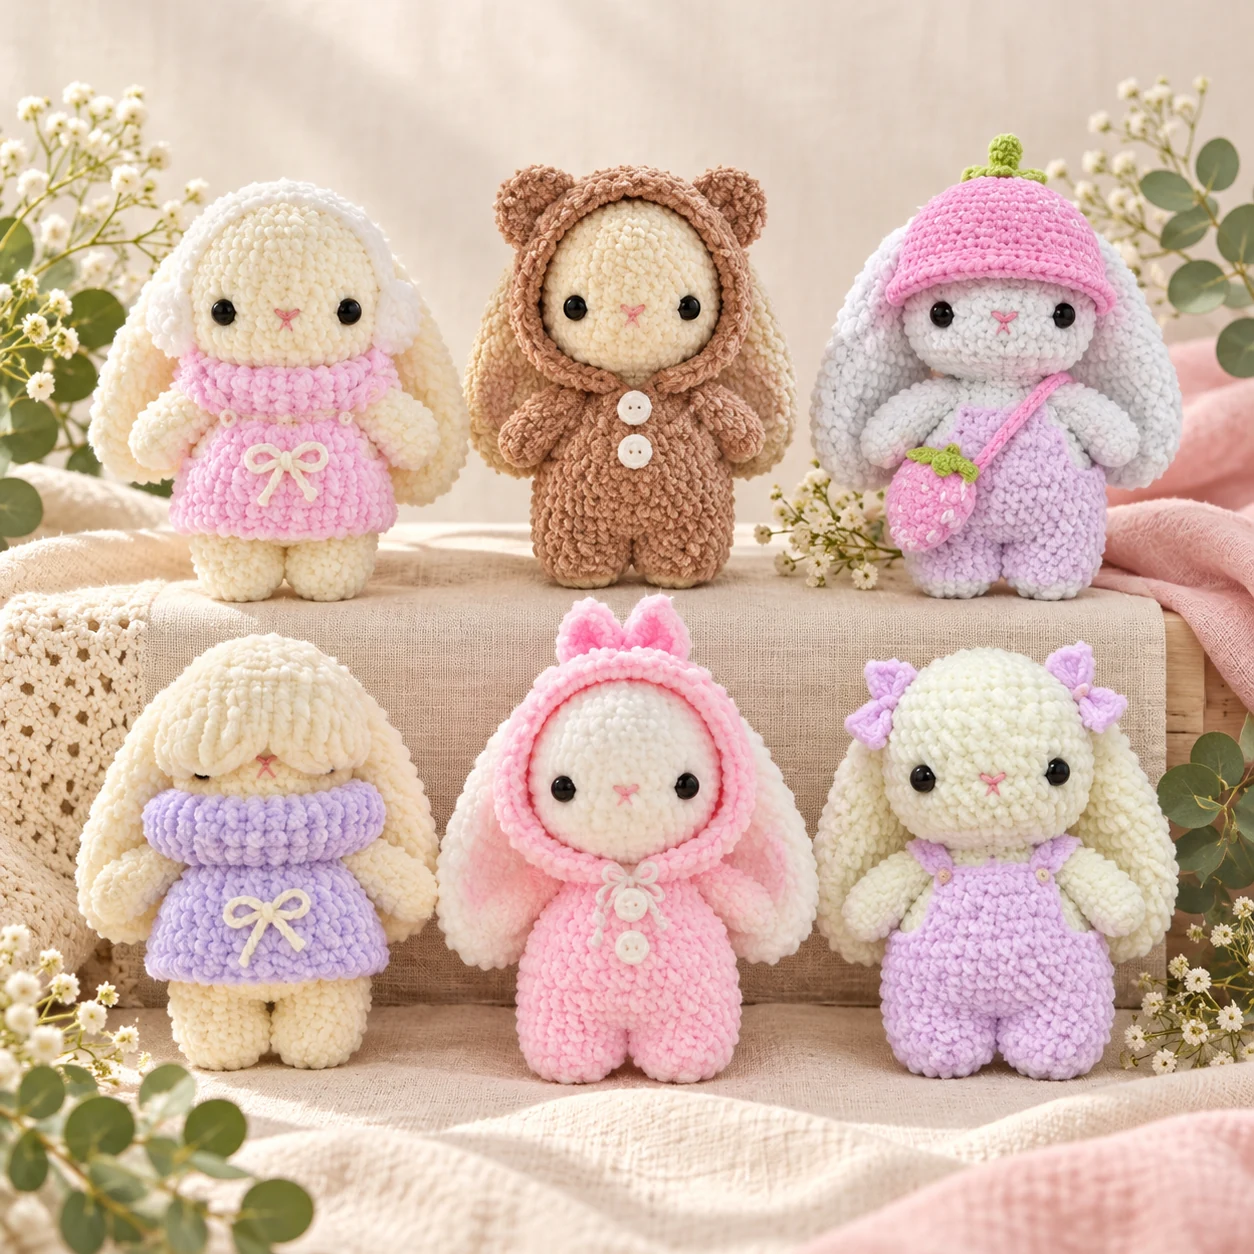
This baby bunny crochet pattern begins with one soft, long-eared character and opens up a whole miniature wardrobe. Imagine a bunny in a lavender sweater, a strawberry hat with a matching bag, or a cozy hooded onesie with tiny bear ears. The same little bunny can have a completely different look with a change of clothes.
The 11-in-1 collection combines the bunny with ten clothing and accessory options. You can choose one outfit for your first project or gradually make the whole wardrobe. Cream, pink, lavender, and warm brown create a gentle palette, while the small bags and bows add playful details.
This guide walks through the collection, materials, construction, fit, and finishing choices so you can plan your own version. You will also find a practical making order and answers to common questions. Keep the complete PDF nearby for the written rounds, stitch counts, and instructional photographs.
One bunny, ten clothing and accessory options, and step-by-step photographs. Digital PDF pattern; finished toys and supplies are not included.
Explore the 11-in-1 Bunny Pattern on Etsy →What is inside the baby bunny crochet pattern?
One bunny, ten wardrobe choices, plenty of personality.
The prepared baby bunny crochet pattern is a 32-page English PDF with written instructions, step-by-step photographs, and a clickable clothing index. It covers the bunny first, then the garments and accessories. That order makes it easier to check each new piece against the bunny you actually made.
The phrase 11-in-1 means the bunny plus ten clothing or accessory options. It does not mean eleven different animal patterns. The wardrobe includes a turtleneck sweater, earmuffs, a sleep mask, overalls, a strawberry bucket hat, a strawberry pouch, little bows, a heart pouch, and bear and bow versions of the hooded pajamas.
Several combinations share the same foundation. The hooded pajamas, for example, can be finished with bear ears or a bow topper. You do not need a separate bunny for every outfit: make the pieces you enjoy and mix them into a small collection.
This article is a project guide to help you choose and prepare. The linked Etsy listing is for a digital crochet pattern. Yarn, tools, and finished plush toys are not included, so gather the supplies separately before beginning.
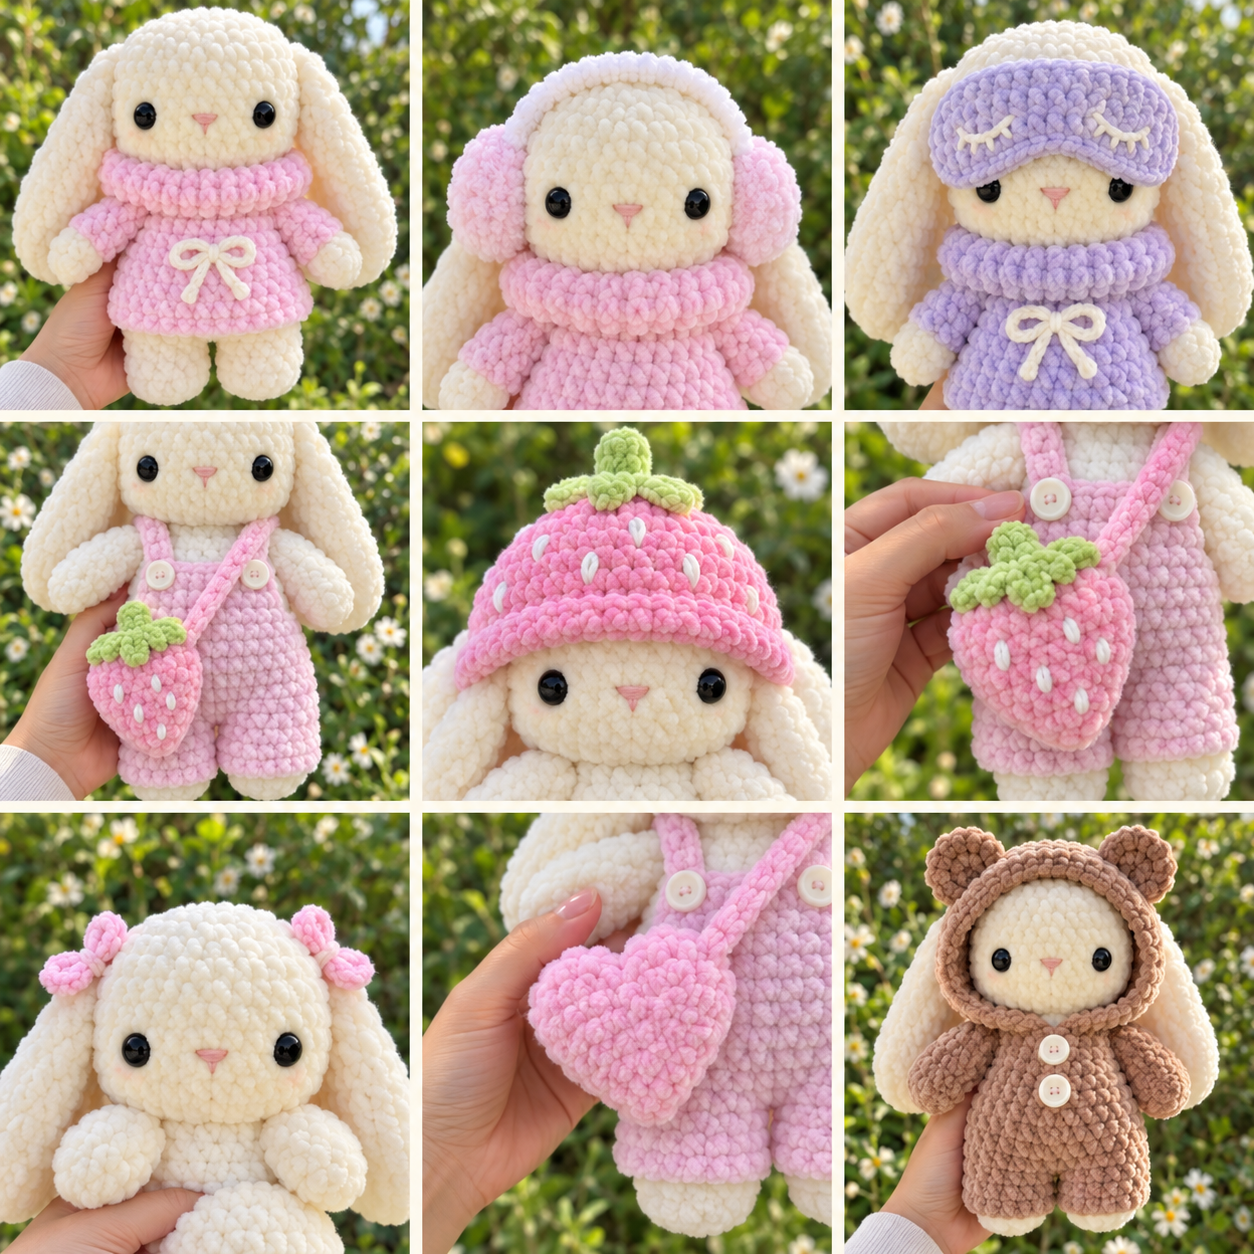
Explore all ten outfits and accessories
Choose the details that make your bunny feel like yours.
1. The turtleneck sweater
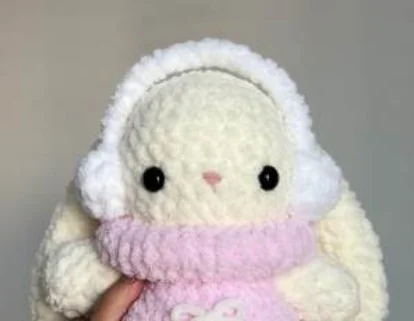
A soft rolled neckline gives the sweater its cozy shape. Lavender creates a gentle contrast with a cream bunny, while pink produces a warmer look. The sweater is worked separately, and the instructions include sleeve finishing. Check the starting chain around the widest part of your bunny before committing to the garment.
2. Little earmuffs
Two rounded pieces and a connecting band frame the bunny’s face. The band length can be adjusted as described in the PDF, which helps accommodate your bunny’s head and ears. Earmuffs make a sweet pairing with the sweater when you want a small extra project after finishing the main garment.
3. A sleepy eye mask
The curved mask creates a relaxed, bedtime-inspired expression. Its strap is made to the length needed for your bunny, so check the fit before fastening off. Keep the mask distinct from the face underneath and avoid pulling the band so tightly that it changes the head shape.
4. Classic overalls
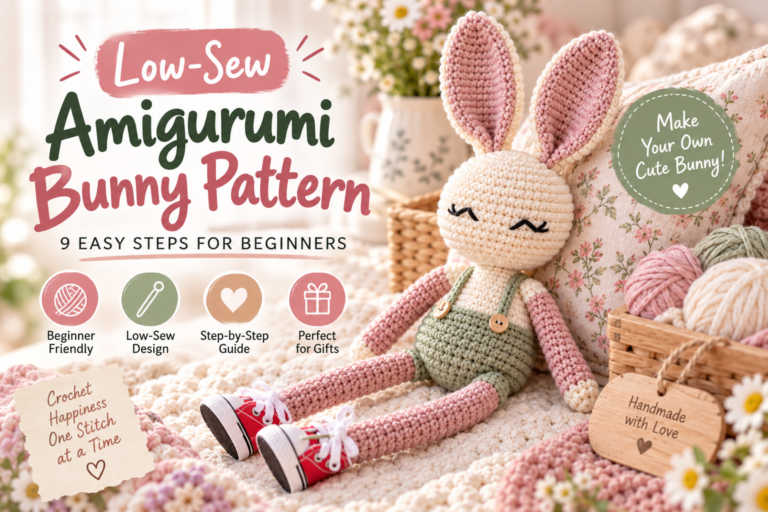
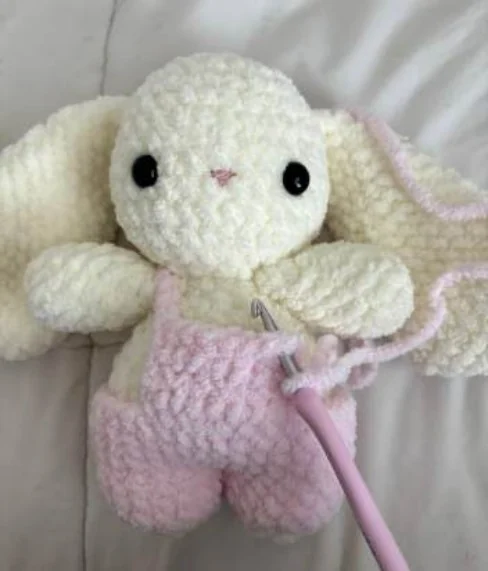
The overalls have small legs, a front bib, and straps. Pink and lavender both work nicely with the collection’s cream and grey bunnies. The instructions ask you to check the leg opening and then position the straps against the finished bunny. Optional buttons add a neat finishing touch at the bib.
5. The strawberry bucket hat
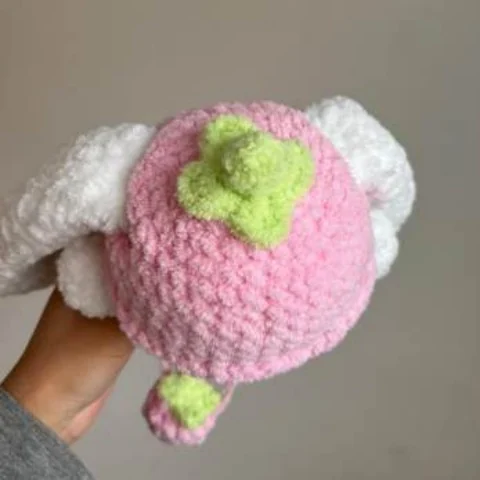
A pink hat with a green stem gives the bunny an immediately recognizable strawberry theme. The construction includes openings for those long ears, so their position matters as much as the overall fit. Read the hat section before starting and keep the bunny nearby when checking the shape.
6. A matching strawberry pouch
The small pink pouch and green top repeat the hat’s colors at a smaller scale. A strap turns it into a miniature shoulder bag, and embroidered white seeds are optional. Make the strap long enough to put on and remove, following the finishing guidance rather than guessing from a promotional photograph.
7. Little bows
These small bows sit in front of the bunny’s ears. The pattern explains how to shape them and how to attach them, with an option to tie them around the ears so they remain removable. Smaller yarn changes their scale, making material choice especially noticeable in this little detail.
8. The heart pouch
Two rounded halves join to form the heart-shaped bag. A long strap completes the accessory and lets it sit across the bunny’s outfit. The PDF uses a different yarn in some demonstration photographs to make the stitches clearer, so focus on the construction shown rather than expecting every image to have identical texture.
9. Bear-ear pajamas
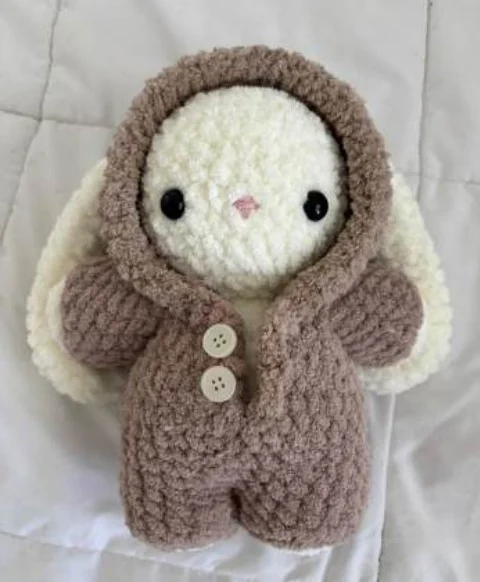
The brown hooded onesie surrounds the face and adds two little bear ears above it. Sleeves, a hood, button holes, and buttons create a complete dressed character. It is a lovely choice when you enjoy assembly and finishing, because those final details do much of the work in defining the look.
10. Bow-topper pajamas
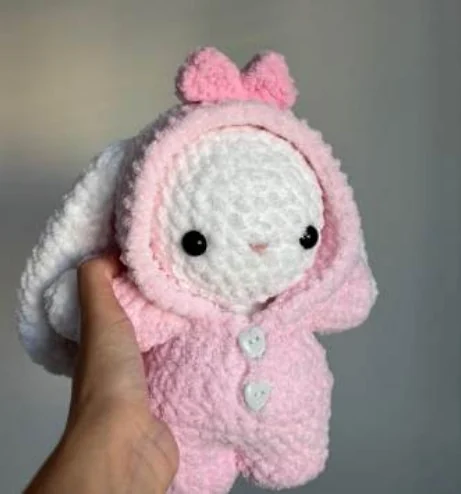
The second pajama look uses a bow on the hood for a softer, playful finish. Pink makes the bow easy to notice against the cream ears. The topper has its own shaping and sewing steps, so leave time for this small component after making the shared pajama body and hood.
Skills to prepare before you begin
A useful project for practicing shaping and finishing.
The baby bunny crochet pattern includes more than a simple round plush body. You will work in continuous rounds unless instructed otherwise, and some clothing sections use turning rows. It helps to recognize the difference before starting, especially when you move from the bunny to a bow or pajama panel.
Expect chains, single crochet, increases, decreases, slip stitches, and work in selected loops. Some accessories also use half double, double, and triple or treble crochet stitches. Read the abbreviations in the PDF and check the terms used in each accessory section before choosing that piece.
There is sewing and assembly. The head, ears, and arms need positioning, while the clothes bring additional details such as straps, sleeves, buttons, and a hood. If you are new to amigurumi, make the bunny and one small accessory first instead of beginning every garment at once.
For a refresher on holding the yarn and forming basic stitches, visit our how to crochet for beginners guide. Practice an unfamiliar stitch in smooth scrap yarn, where the loops are easier to see, then return to your plush yarn.
Materials for your baby bunny crochet pattern
Gather the main supplies, then the extras for your chosen outfit.
The main materials list calls for a 6 mm crochet hook and chenille-style yarn; Alize Softy Mega is the yarn named in the guide. It also specifies size 4 worsted pink yarn for the embroidered nose, 14 mm safety eyes, a jumbo tapestry needle, stuffing, and scissors.
- Chenille-style yarn for the bunny and chosen clothes.
- A 6 mm crochet hook for the main project.
- Size 4 worsted pink yarn for the nose.
- 14 mm safety eyes as specified in the pattern.
- A jumbo tapestry needle, stuffing, and scissors.
- Two buttons, size 1 yarn, and a mini tapestry needle for the pajamas.
Some smaller accessories use finer chenille and a smaller hook. The setup notes mention Alize Softy Plus and a 3.5 mm hook for optional smaller pieces, while the little-bow and heart-pouch sections specifically mention a 3 mm hook. Follow the section you are making rather than applying one small-hook size to every accessory.
The guide also allows the specified worsted pink yarn as an alternative for certain small accessories. Using the same larger yarn as the bunny will make those accessories bigger. Keep this choice deliberate, especially if you want a delicate bow or a small pouch.
Choose yarn and colors as a coordinated set
The bunny and its clothes need to work together.
Begin with the bunny color, then choose two or three clothing shades that sit comfortably beside it. Cream with lavender and pink gives a gentle pastel collection. Grey makes the pink strawberry hat stand out, while warm brown creates a clear bear-pajama silhouette.
Compare yarn thickness as well as color. Two yarns that both feel soft may produce noticeably different fabric. If one is much fuller than the other, the clothes may fit differently even when you follow the same stitch counts. Make your first outfit with materials that are close to the suggested combination.
Chenille can make it harder to see individual stitches. Work in good light and use a contrasting marker if that helps you identify the beginning of a round. Avoid repeatedly pulling the same section apart, especially if the yarn begins to lose its pile.
Keep the labels and a small sample of each yarn with your project notes. A written color name, hook size, and brand are useful when you return to the wardrobe later. You may find that one finished bunny encourages you to add another outfit a few weeks afterward.
A calm order for making the collection
Finish one character before building a whole wardrobe.
A manageable order makes this baby bunny crochet pattern easier to enjoy. Start by reading the materials and bunny sections completely. Notice when you will need stuffing, facial details, sewing tails, and assembly. Prepare those supplies before the piece becomes difficult to access.
- Make the bunny pieces. Follow the legs, body, head, ears, and arms in the order given in the PDF.
- Finish the face and assembly. Check placement from the front before securing the separate pieces.
- Choose one garment. Keep the finished bunny beside you while checking the clothing fit.
- Add a small accessory. A bow, pouch, or pair of earmuffs gives the outfit another detail without starting a second full plush.
When you pause, note the section and the last completed round or row. A quick note is especially helpful when the same round number appears in several different accessories. Store each unfinished piece with its yarn tail so it is clear what belongs together.
You do not need to complete all ten wardrobe options in one stretch. A finished bunny with one carefully fitted outfit is a satisfying first milestone. Let the rest of the collection grow at a pace that suits your crochet time.
Shape the bunny before fitting the clothes
Even filling and careful assembly make the wardrobe easier.
The bunny’s shape affects every outfit that comes afterward. Check your stitch counts as you work, particularly where the legs join and the body narrows. The pattern includes guidance for closing gaps between the legs with the yarn tail; use that step before treating a gap as a stuffing problem.
Add filling in small amounts and spread it evenly. Look at the body from several angles rather than concentrating on one spot. Too much stuffing can stretch the crochet fabric and make the clothes harder to fit; too little can leave the bunny without enough support for the outfit.
The long ears are left unstuffed in the instructions. Their soft drape is part of the character, so keep them flexible and compare their position before sewing. The arms are filled only partly, following the PDF’s guidance, which helps them sit against the body.
Pin or hold the head and limbs in position, then look at the bunny straight on. Check that the arms relate evenly to the legs and that the face points forward. Small placement changes can affect the expression and how the straps or sleeves will sit later.
Make the clothes fit your actual bunny
Use the pattern’s fitting checkpoints as you work.
Clothing fit is one of the most useful things to check early in this baby bunny crochet pattern. The sweater instructions ask you to wrap the foundation chain around the widest part of the bunny. If it is too tight, review the suggested tension adjustment before making the rest of the garment.
The overalls and pajamas also begin with leg openings that should be checked against the bunny. Keep the foundation chain from twisting as you join it. A twisted opening or a very tight chain can cause problems that become more obvious only after you have added several rounds.
Fit the straps on the bunny before fastening off. The overalls use stitch markers to help position the straps on the back, and the accessory straps need enough length to put on and remove. These checkpoints are more reliable than copying an apparent length from a photograph.
If something feels wrong, first compare the yarn thickness, hook, tension, and completed instructions. Change one variable at a time. This collection does not give a universal finished size that applies to every yarn substitution, so let your actual bunny guide the fitting checks.
One bunny, ten clothing and accessory options, and step-by-step photographs. Digital PDF pattern; finished toys and supplies are not included.
Get the Complete Bunny Crochet PDF on Etsy →Create the strawberry hat and bag pairing
A small coordinated set with a clear color story.
The strawberry combination gives the wardrobe a cheerful focal point. A pink hat, a green stem, and a matching pouch repeat the same colors in two places. Against a grey bunny and lavender overalls, the bright pink remains easy to see without needing many extra decorative details.
Read the hat’s ear-opening instructions carefully before working that stage. Long ears need room to pass through, and their placement changes the way the hat sits around the face. Try the developing hat on the bunny when the instructions allow and check that the face remains visible.
The pouch uses a small amount of stuffing and a separate green top. Finish the shape before judging the strap length. Hold the pouch against the dressed bunny, then follow the PDF’s method for creating a strap that can go on and off.
Optional white seeds add another detail. Keep them spaced so the pink surface still reads clearly, and use gentle embroidery tension to avoid pulling the pouch out of shape. You can also leave the seeds off for a simpler version of the same little bag.
Finish the bear and bow pajamas
One shared foundation, two different expressions.
The hooded pajamas are the most complete clothing look in the baby bunny crochet pattern. The body includes panels, sleeves, and a closure, followed by the hood. The bear version adds small ears, while the bow version adds a shaped topper, so both looks build on the same general outfit.
Check the placement of the hood on the bunny before sewing it onto the onesie. The instructions suggest using stitch markers to establish where the front connects. Take time here: a hood that sits comfortably around the face makes the finished outfit look more intentional.
Follow the button-hole and button-placement steps together so both sides line up. The supplied materials list includes two buttons, size 1 yarn, and a mini tapestry needle for this finishing work. Lay the front panels flat and compare their position before attaching the buttons permanently.
For the bow topper, the guide uses a smaller chenille yarn and a 3.5 mm hook, with a note that larger yarn produces a larger bow. Some process photographs use less fluffy yarn for visibility. Keep the written instructions beside those photographs when forming and securing the bow.
Small finishing details that make a difference
Give the final stitches the same attention as the first.
Before weaving in the last ends, look over the bunny and its clothes in natural light. Check the face, ear placement, visible seams, and the points where straps join the garments. These details are easier to adjust before every tail is hidden away.
Keep embroidery tension gentle. The pink nose sits on a soft surface, and pulling too firmly can distort the surrounding stitches. Work a little at a time and look at the whole face between stitches instead of judging only the needle’s entry point.
The little bows can be sewn in place or tied around the ears according to the pattern. Decide how you want to change the outfits before choosing the attachment method. A removable detail is useful when you want to alternate between a hat, earmuffs, and bows.
Finally, dress and undress the bunny carefully once to check the openings and straps. Avoid forcing a tight garment over the head or pulling on a decorative piece. If a detail catches, inspect that area and compare it with the fitting guidance before calling the project finished.
Troubleshooting the bunny and wardrobe
Start with the cause, then make one small adjustment.
The stitches are difficult to count
Improve the light and mark the start of the round. Pause after a short group of stitches when the yarn is especially fluffy. Check your count before beginning the next shaping round so an unnoticed extra stitch does not carry into the rest of the body.
An outfit is too tight
Check the foundation chain first, then compare the yarn and tension with the pattern. Make sure you followed the correct garment section and did not miss a turning instruction. The PDF includes fitting checks for the sweater and leg openings; return to those before changing stitch counts.
The two sides look different
Compare the round counts, stuffing, and placement. An arm can look longer because it is attached lower, and an ear can seem wider because it is twisted. Lay the paired pieces beside each other before sewing so construction and positioning are checked separately.
The accessory looks oversized
Review the yarn and hook specified for that accessory. The guide intentionally uses smaller materials for some details and explains that the bunny’s larger yarn can create bigger accessories. Decide whether you like that larger look or would prefer to remake the piece with finer yarn.
Style and photograph your finished collection
Let the handmade texture and tiny outfits stand out.
A plain background and soft daylight help the long ears and little clothes remain the focus. Photograph one dressed bunny first, then arrange the wardrobe around it or show several finished versions together. Keep the camera near the bunny’s eye level so the head does not hide the clothing.
Choose a limited palette for the background. Cream linen works with pink and lavender, while a pale neutral surface lets the brown bear pajamas stand out. Leave space between pieces in a collection photograph so a small bag or bow does not disappear behind another bunny.
The images in this article come from the original pattern and its crochet process photographs. Use them together with the PDF’s written rounds, stitch counts, and assembly guidance for the exact construction details. Your yarn, tension, stuffing, and finishing choices will influence your own result.
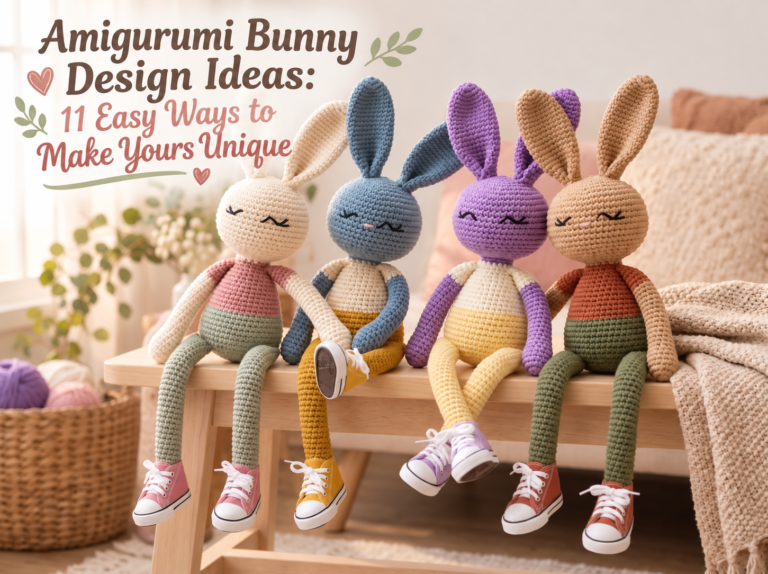
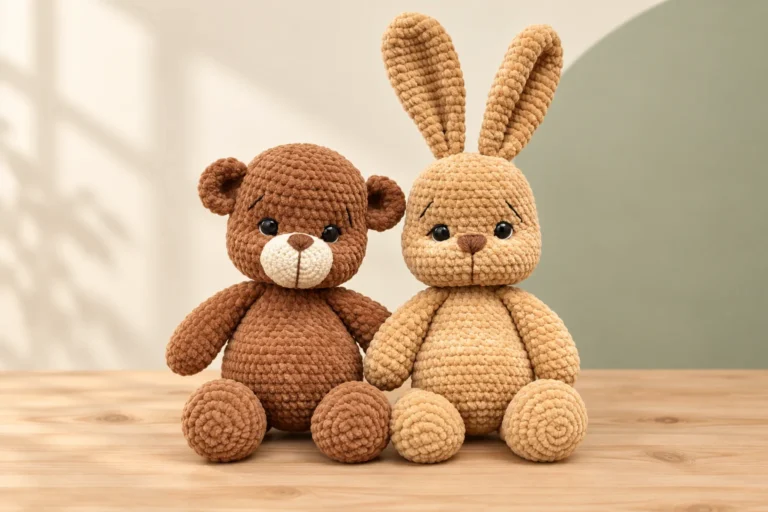
For more ways to personalize a handmade character, explore our amigurumi bunny design ideas. If you would like a companion project after this wardrobe, our bunny and bear crochet pattern guide offers another soft-toy collection to consider.
Baby bunny crochet pattern: quick questions
A few practical answers before you pick your first outfit.
What does 11-in-1 include?
It means one bunny pattern plus ten clothing and accessory options: sweater, earmuffs, sleep mask, overalls, strawberry hat, strawberry pouch, little bows, heart pouch, bear pajamas, and bow-topper pajamas. The two pajama looks share a foundation.
Is this a free baby bunny crochet pattern?
No. This article introduces the project and helps you plan. The complete written rounds, stitch counts, and step-by-step photographs are in the digital PDF available through the linked Etsy listing. Check that listing for its current price.
Will I receive a finished bunny?
The listing is for a digital crochet pattern, not a completed plush, yarn bundle, or supply kit. You use the instructions to make the bunny and wardrobe yourself. Gather the tools and materials for the pieces you plan to crochet.
Is the bunny made without sewing?
No. The project includes assembly and sewing, including the head, arms, ears, and some clothing details. Read the finishing sections before beginning so you can leave the required tails and plan time for joining the pieces.
Can I make it as a beginner?
You will be more comfortable if you already know basic crochet stitches, increases, decreases, and working in rounds. Clothing adds fitting, rows, and assembly. Start with the bunny and one accessory, and practice unfamiliar stitches before making the full wardrobe.
What size will my bunny be?
The supplied guide does not state one reliable finished height for every version. Yarn thickness, hook size, tension, and stuffing affect the result. Make the bunny first and use it to check the clothes instead of assuming a measurement from a photo.
Can I substitute yarn or change colors?
You can choose different colors, but a different yarn thickness may change both size and clothing fit. Some accessories intentionally use smaller yarn and hooks. Follow each section’s material notes and check the pieces on your bunny as you work.
Do I have to make every outfit?
No. The collection lets you choose the garments and accessories you like. Make one outfit first, keep your material notes, and add more pieces later. A sweater with earmuffs or overalls with a pouch makes a complete little look on its own.
Choose your first bunny outfit
A small wardrobe can grow one enjoyable project at a time.
The appeal of this baby bunny crochet pattern is the variety you can create around one familiar character. Long ears and a simple face provide the foundation. A rolled sweater collar, a strawberry bag, or a hood with bear ears then changes the whole mood.
Choose the look that makes you most excited to pick up your hook. Gather its materials, read the relevant sections, and make the bunny before fitting the clothes. Give yourself time to adjust placement and enjoy the finishing instead of rushing straight to the next outfit.
When you are ready for the complete instructions, open the 32-page PDF and use its clickable index to move between the wardrobe sections. Keep this guide for planning and inspiration as your own collection grows from one dressed bunny into a set of favorite handmade looks.
One bunny, ten clothing and accessory options, and step-by-step photographs. Digital PDF pattern; finished toys and supplies are not included.
See the 11-in-1 Baby Bunny Pattern on Etsy →