How to Crochet a Long-Legged Amigurumi Bunny: Easy Beginner Guide

<article class="bunny-article">

  <!-- =========================
       ARTICLE HEADER
  ========================== -->
  <header class="bunny-article-header">

    <div class="bunny-article-category">
      AMIGURUMI BUNNY TUTORIAL
    </div>

    <h1>
      How to Crochet a
      <span>Long-Legged Amigurumi Bunny</span>
    </h1>

    <p class="bunny-article-intro">
      This <strong>long-legged amigurumi bunny</strong> is a sweet and playful
      crochet project with oversized ears, a sleepy expression and adorable
      floppy legs.
    </p>

    <p class="bunny-article-intro">
      In this beginner-friendly guide, you'll discover how the bunny is
      constructed, how to shape each part neatly and which small details make
      the finished toy look polished and full of personality.
    </p>

  </header>


  <!-- =========================
       FEATURED IMAGE
  ========================== -->
  <figure class="bunny-article-image">

    <img
      src="YOUR-IMAGE-URL"
      alt="long-legged amigurumi bunny crochet pattern"
      loading="lazy"
    >

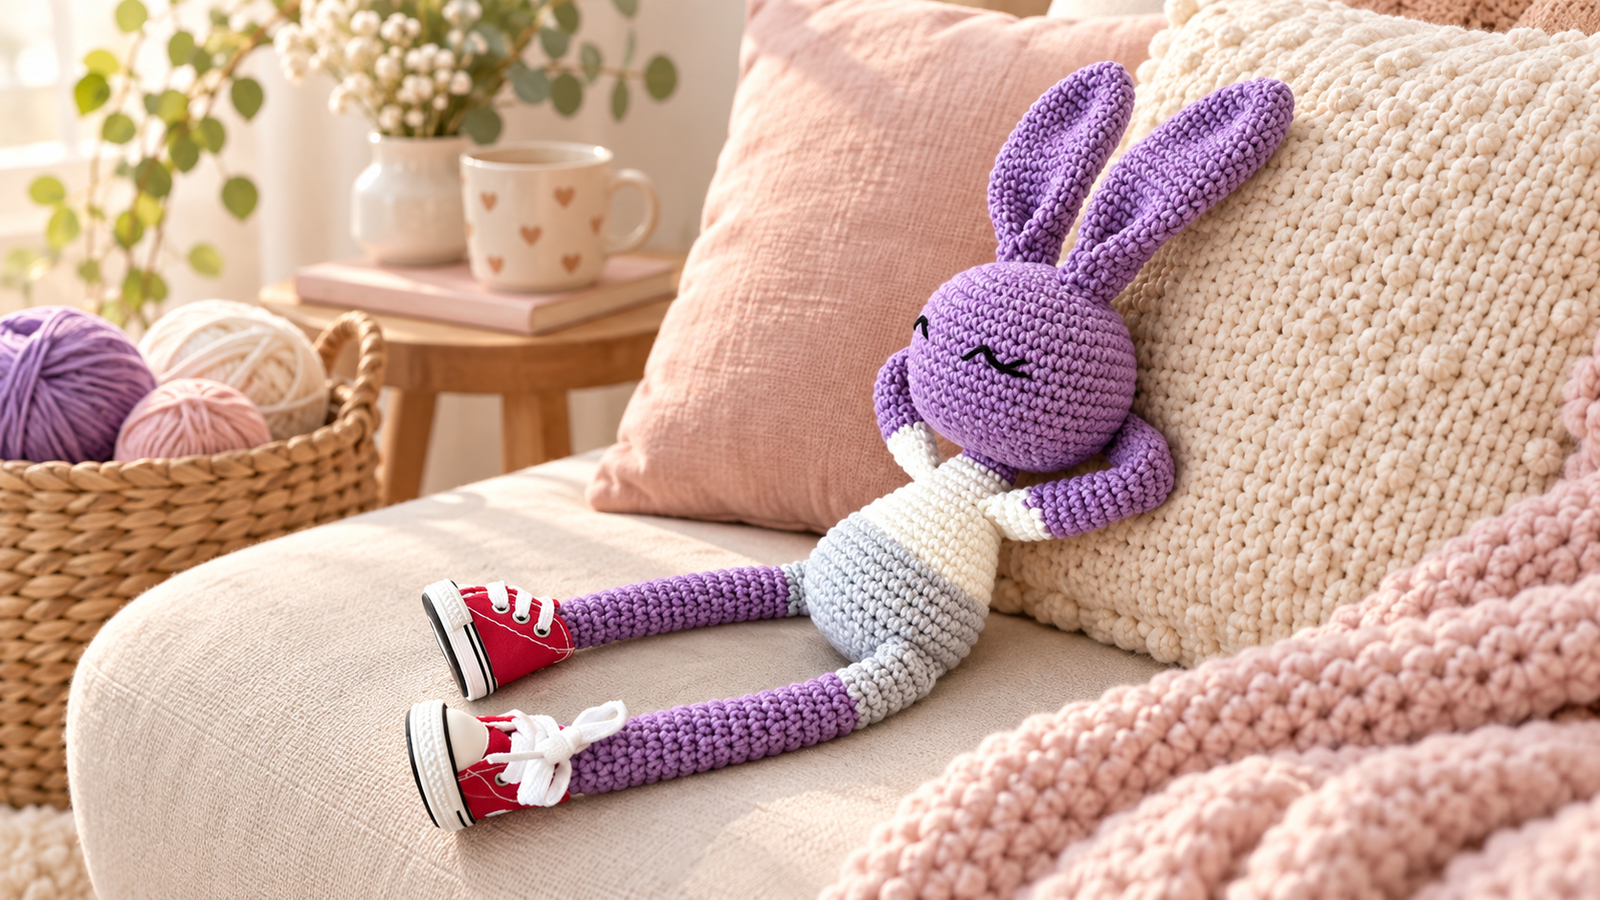
    <figcaption>
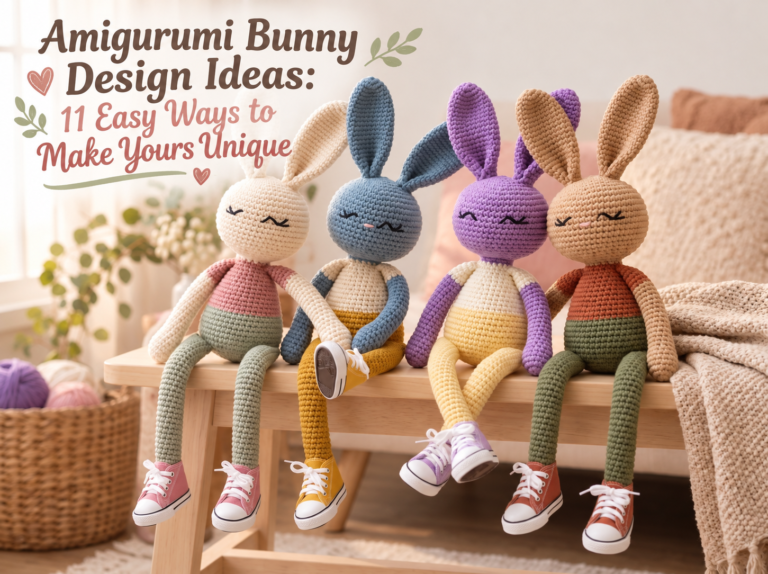
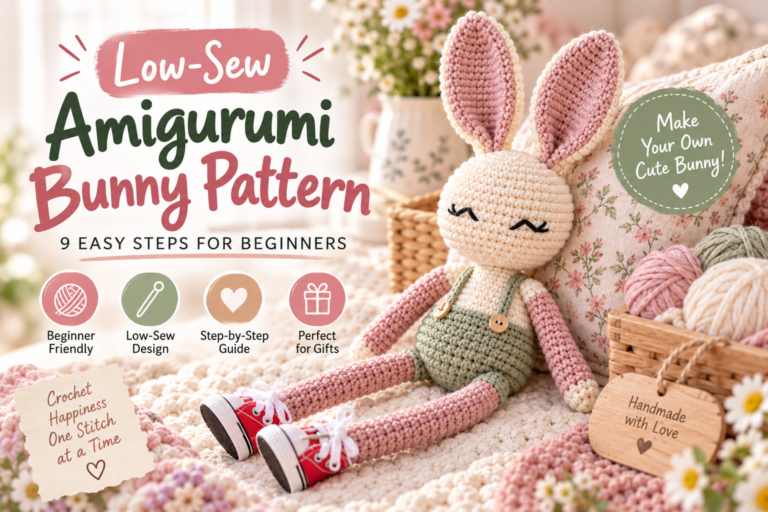
      A cute long-legged crochet bunny with oversized ears and a relaxed,
      handmade look.
    </figcaption>

  </figure>


  <!-- =========================
       QUICK INTRO BOX
  ========================== -->
  <section class="bunny-quick-box">

    <div class="bunny-small-title">
      PROJECT AT A GLANCE
    </div>

    <div class="bunny-quick-grid">

      <div>
        <strong>Skill Level</strong>
        <span>Beginner Friendly</span>
      </div>

      <div>
        <strong>Technique</strong>
        <span>Amigurumi Crochet</span>
      </div>

      <div>
        <strong>Main Style</strong>
        <span>Long-Legged Bunny</span>
      </div>

      <div>
        <strong>Best For</strong>
        <span>Gifts &amp; Handmade Decor</span>
      </div>

    </div>

  </section>


  <!-- =========================
       WHY YOU'LL LOVE IT
  ========================== -->
  <section class="bunny-content-section">

    <h2>
      Why You'll Love This Long-Legged Amigurumi Bunny
    </h2>

    <p>
      Classic amigurumi animals are often small and rounded, but this bunny
      gets its personality from its unusual proportions.
    </p>

    <p>
      The long legs create a soft, floppy look while the oversized ears make
      the face feel even cuter.
    </p>

    <p>
      Another advantage is how easy the design is to personalize. You can
      change the yarn colors, add a small scarf, create a striped body or
      experiment with different facial expressions.
    </p>

    <div class="bunny-tip">
      <strong>Beginner Tip:</strong>
      Don't worry about making every stitch perfectly identical.
      Small handmade differences are part of the charm of amigurumi.
    </div>

  </section>


  <!-- =========================
       MATERIALS
  ========================== -->
  <section class="bunny-content-section bunny-soft-box">

    <div class="bunny-small-title">
      BEFORE YOU START
    </div>

    <h2>Materials You'll Need</h2>

    <p>
      You don't need a huge collection of supplies to make this bunny.
      A few basic crochet tools are enough.
    </p>

    <ul class="bunny-check-list">

      <li>
        Cotton or acrylic yarn for the bunny
      </li>

      <li>
        Contrasting yarn for clothing or body details
      </li>

      <li>
        Crochet hook suitable for your yarn
      </li>

      <li>
        Polyester fiberfill
      </li>

      <li>
        Yarn needle
      </li>

      <li>
        Stitch marker
      </li>

      <li>
        Scissors
      </li>

      <li>
        Black embroidery thread for the face
      </li>

    </ul>

    <div class="bunny-tip">
      <strong>Helpful Tip:</strong>
      Amigurumi usually looks best with tight stitches. Using a slightly
      smaller hook can help prevent the stuffing from showing through.
    </div>

  </section>


  <!-- =========================
       BEGINNER LINK
  ========================== -->
  <section class="bunny-mini-cta">

    <p>
      New to crochet toys?
      Start with our
      <a href="/beginner-guides/">
        amigurumi beginner guides
      </a>
      before beginning your bunny.
    </p>

  </section>


  <!-- =========================
       STEP 1
  ========================== -->
  <section class="bunny-content-section">

    <div class="bunny-step-number">
      STEP 01
    </div>

    <h2>Start With the Bunny Head</h2>

    <p>
      The head is usually worked in continuous rounds, beginning with a magic
      ring and gradually increasing to create a smooth round shape.
    </p>

    <p>
      Once the widest part of the head is reached, several even rounds help
      maintain the shape before the decreases begin.
    </p>

    <p>
      Stuff gradually as you work instead of adding all the fiberfill at the
      end.
    </p>

    <div class="bunny-note">
      A firm head holds its shape well, but overstuffing can stretch the
      stitches and make the surface look uneven.
    </div>

  </section>


  <!-- =========================
       STEP 2
  ========================== -->
  <section class="bunny-content-section">

    <div class="bunny-step-number">
      STEP 02
    </div>

    <h2>Crochet the Long Bunny Ears</h2>

    <p>
      The ears are one of the most noticeable parts of this design, so take
      your time with them.
    </p>

    <p>
      Both ears should use the same yarn, tension and number of rounds.
      Compare them while crocheting rather than waiting until the end.
    </p>

    <h3>How to Position the Ears Evenly</h3>

    <p>
      Before sewing, place both ears on the head with pins.
      Look at the bunny from the front and check whether both ears begin at
      approximately the same height.
    </p>

    <p>
      Small adjustments at this stage can completely change the expression
      of the finished bunny.
    </p>

  </section>


  <!-- =========================
       PDF CTA #1
  ========================== -->
  <aside class="bunny-guide-cta">

    <div class="bunny-guide-badge">
      WANT THE EXACT PATTERN?
    </div>

    <h2>
      Crochet This Bunny Without the Guesswork
    </h2>

    <p>
      The tutorial you're reading explains the construction and the most
      important techniques.
    </p>

    <p>
      If you want to make the exact bunny from start to finish, the complete
      PDF guide gives you everything in one organized pattern.
    </p>

    <div class="bunny-guide-features">

      <span>✓ Exact stitch counts</span>
      <span>✓ Round-by-round pattern</span>
      <span>✓ Body &amp; leg instructions</span>
      <span>✓ Ear placement guidance</span>
      <span>✓ Assembly instructions</span>
      <span>✓ Finishing tips</span>

    </div>

    <a
      href="YOUR-GUIDE-URL"
      class="bunny-guide-button"
    >
      GET THE COMPLETE PDF GUIDE →
    </a>

    <small class="bunny-cta-note">
      Easy-to-follow format • Keep it on your phone or print it
    </small>

  </aside>


  <!-- =========================
       STEP 3
  ========================== -->
  <section class="bunny-content-section">

    <div class="bunny-step-number">
      STEP 03
    </div>

    <h2>Shape the Bunny Body</h2>

    <p>
      The body is intentionally smaller than the head.
      This difference in size helps create the cute proportions associated
      with this bunny style.
    </p>

    <p>
      Gradual increases form the upper body and belly, while controlled
      decreases shape the lower section.
    </p>

    <p>
      Keep checking the body from different angles while stuffing.
      This makes it easier to correct uneven areas before closing the piece.
    </p>

  </section>


  <!-- =========================
       STEP 4
  ========================== -->
  <section class="bunny-content-section">

    <div class="bunny-step-number">
      STEP 04
    </div>

    <h2>Create the Signature Long Legs</h2>

    <p>
      The legs are what give the
      <strong>long-legged amigurumi bunny</strong>
      its distinctive personality.
    </p>

    <p>
      Instead of building short rounded legs, this style uses narrow,
      elongated shapes that remain slightly flexible.
    </p>

    <p>
      Avoid packing too much stuffing into the upper portion of the legs.
      A little flexibility helps the bunny sit and pose more naturally.
    </p>

    <div class="bunny-tip">
      <strong>Smart Trick:</strong>
      Crochet both legs during the same session and compare them every few
      rounds. It's much easier to keep their length consistent this way.
    </div>

  </section>


  <!-- =========================
       STEP 5
  ========================== -->
  <section class="bunny-content-section">

    <div class="bunny-step-number">
      STEP 05
    </div>

    <h2>Make and Attach the Arms</h2>

    <p>
      Keep the arms slim enough to match the long proportions of the bunny.
    </p>

    <p>
      You usually don't need heavy stuffing inside the arms.
      A small amount can help maintain their shape without making them stiff.
    </p>

    <p>
      Pin both arms to the body before sewing permanently.
      Check the placement from the front, side and back.
    </p>

  </section>


  <!-- =========================
       STEP 6
  ========================== -->
  <section class="bunny-content-section">

    <div class="bunny-step-number">
      STEP 06
    </div>

    <h2>Create the Sweet Bunny Face</h2>

    <p>
      Facial details can completely change the personality of an amigurumi
      bunny.
    </p>

    <p>
      For a calm and cozy expression, embroidered sleepy eyes work beautifully
      with this design.
    </p>

    <p>
      Mark the position of both eyes with pins before adding the final
      embroidery.
    </p>

    <h3>A Simple Face Placement Trick</h3>

    <p>
      Put the bunny on a table and take one step back before embroidering.
      Looking at the face from a distance makes uneven placement much easier
      to notice.
    </p>

  </section>


  <!-- =========================
       MISTAKES
  ========================== -->
  <section class="bunny-content-section bunny-soft-box">

    <div class="bunny-small-title">
      BEGINNER-FRIENDLY ADVICE
    </div>

    <h2>5 Mistakes to Avoid</h2>

    <ol class="bunny-number-list">

      <li>
        <strong>Overstuffing the legs</strong>
        <p>
          Too much stuffing can remove the relaxed, floppy look.
        </p>
      </li>

      <li>
        <strong>Making the ears different sizes</strong>
        <p>
          Compare both ears regularly while crocheting.
        </p>
      </li>

      <li>
        <strong>Using loose tension</strong>
        <p>
          Large gaps between stitches may reveal the stuffing.
        </p>
      </li>

      <li>
        <strong>Ignoring round counts</strong>
        <p>
          Even one or two additional rounds can make one leg noticeably longer.
        </p>
      </li>

      <li>
        <strong>Rushing the face</strong>
        <p>
          Take a few extra minutes to test the placement before embroidering.
        </p>
      </li>

    </ol>

  </section>


  <!-- =========================
       CUSTOMIZATION
  ========================== -->
  <section class="bunny-content-section">

    <h2>4 Cute Ways to Customize Your Bunny</h2>

    <p>
      One of the best things about amigurumi is that the same basic design can
      look completely different with a few small changes.
    </p>

    <div class="bunny-idea-grid">

      <div>
        <span>01</span>
        <strong>Pastel Colors</strong>
        <p>
          Try lavender, dusty pink, cream or sage green.
        </p>
      </div>

      <div>
        <span>02</span>
        <strong>Striped Body</strong>
        <p>
          Alternate yarn colors to create a playful outfit.
        </p>
      </div>

      <div>
        <span>03</span>
        <strong>Tiny Accessories</strong>
        <p>
          Add a crochet scarf, bow or miniature bag.
        </p>
      </div>

      <div>
        <span>04</span>
        <strong>Different Faces</strong>
        <p>
          Experiment with sleepy eyes, open eyes or a tiny smile.
        </p>
      </div>

    </div>

    <p>
      For even more inspiration, browse our
      <a href="/bunny-ideas/">
        amigurumi bunny ideas
      </a>.
    </p>

  </section>


  <!-- =========================
       FINAL RESULT
  ========================== -->
  <section class="bunny-content-section">

    <h2>Finishing Your Long-Legged Amigurumi Bunny</h2>

    <p>
      Once every piece is attached, spend a few minutes adjusting the shape
      of your bunny.
    </p>

    <p>
      Gently move the ears, arms and legs into position and check the
      embroidery one final time.
    </p>

    <p>
      Your finished <strong>long-legged amigurumi bunny</strong> should feel
      soft, playful and full of handmade character.
    </p>

  </section>


  <!-- =========================
       FINAL SALES CTA
  ========================== -->
  <section class="bunny-final-cta">

    <div class="bunny-small-title">
      READY TO MAKE YOUR BUNNY?
    </div>

    <h2>
      Follow the Complete Pattern Step by Step
    </h2>

    <p>
      You now understand how this bunny comes together.
      The PDF guide takes the next step by giving you the exact pattern in a
      simple format you can follow while crocheting.
    </p>

    <div class="bunny-final-benefits">

      <span>Exact rounds</span>
      <span>Stitch counts</span>
      <span>Assembly guide</span>
      <span>Beginner tips</span>

    </div>

    <a
      href="YOUR-GUIDE-URL"
      class="bunny-guide-button"
    >
      GET THE LONG-LEGGED BUNNY PDF →
    </a>

  </section>


  <!-- =========================
       KEEP LEARNING
  ========================== -->
  <section class="bunny-related">

    <div class="bunny-small-title">
      KEEP CROCHETING
    </div>

    <h2>More From Amigurumi Bunny</h2>

    <div class="bunny-related-links">

      <a href="/tutorials/">
        Bunny Tutorials →
      </a>

      <a href="/beginner-guides/">
        Beginner Guides →
      </a>

      <a href="/bunny-ideas/">
        Bunny Inspiration →
      </a>

    </div>

  </section>

</article>
<img
  src="YOUR-IMAGE-URL"
  alt="Purple long-legged amigurumi bunny crochet design"
>

<figcaption>
  A playful long-legged amigurumi bunny with oversized ears and a relaxed sleepy expression.
</figcaption>
<h2>Why This Bunny Design Stands Out</h2>

<p>
  One of the most charming things about this bunny is its unusual body
  shape. Instead of using short rounded legs, the design uses long,
  narrow legs that create a fun and slightly floppy appearance.
</p>

<p>
  The oversized ears balance the proportions beautifully, while the
  embroidered sleepy eyes give the bunny a calm and lovable personality.
  You can also customize the colors, clothing and accessories to make
  your finished bunny completely unique.
</p>
<div class="bunny-small-title">
  BEFORE YOU START
</div>

<h2>Materials You’ll Need</h2>

<ul class="bunny-check-list">
  <li>Cotton or acrylic yarn in your chosen bunny color</li>
  <li>A contrasting yarn color for the body or clothing</li>
  <li>A crochet hook suitable for your yarn</li>
  <li>Polyester fiberfill</li>
  <li>Yarn needle</li>
  <li>Stitch marker</li>
  <li>Scissors</li>
  <li>Black embroidery thread for the eyes</li>
</ul>

<p class="bunny-tip">
  <strong>Tip:</strong>
  Use a slightly smaller crochet hook than you would normally use for
  your yarn. Tight stitches help prevent stuffing from showing through.
</p>
<h2>1. Start With the Bunny Head</h2>

<p>
  The head is built using the classic amigurumi technique of working in
  continuous rounds. Start with a magic ring and gradually increase until
  you reach the desired width.
</p>

<p>
  After several straight rounds, begin decreasing gradually to create a
  smooth rounded shape.
</p>

<div class="bunny-note">
  Don’t overstuff the head. A firm but slightly soft shape will give the
  bunny a more relaxed handmade appearance.
</div>
<h2>2. Make the Long Bunny Ears</h2>

<p>
  The ears are one of the most important features of this design.
  Keeping them long and slightly narrow creates the distinctive silhouette.
</p>

<p>
  Crochet both ears using the same stitch count and number of rounds.
  Before attaching them, place them temporarily on the head and compare
  their position from the front.
</p>

<h3>How to Keep Both Ears Even</h3>

<p>
  Count the stitches between each ear before sewing. This simple step can
  make a huge difference in the final appearance of your bunny.
</p>
<div class="bunny-guide-badge">
  WANT THE EXACT PATTERN?
</div>

<h2>
  Make This Bunny Step by Step
</h2>

<p>
  This article gives you the overall process, but if you want the exact
  stitch counts, round-by-round instructions, assembly placement and
  finishing details, the complete PDF guide puts everything together in
  one easy-to-follow format.
</p>

<ul>
  <li>✓ Exact stitch counts and rounds</li>
  <li>✓ Head, ears, body and long-leg instructions</li>
  <li>✓ Assembly and placement guide</li>
  <li>✓ Stuffing and shaping tips</li>
  <li>✓ Face embroidery instructions</li>
  <li>✓ Beginner-friendly step-by-step format</li>
</ul>

<a href="#" class="bunny-guide-button">
  GET THE COMPLETE PDF GUIDE →
</a>
<h2>3. Crochet the Body</h2>

<p>
  The body is smaller than the head, which helps maintain the playful
  proportions of the design.
</p>

<p>
  Gradual increases create the chest and belly, followed by decreases
  toward the lower body. Add stuffing little by little instead of waiting
  until the very end.
</p>
<h2>4. Create the Signature Long Legs</h2>

<p>
  The long legs are what give this amigurumi bunny its recognizable look.
  They are crocheted as narrow tubes with relatively few increases.
</p>

<p>
  Avoid stuffing the legs too firmly. Keeping part of the leg flexible
  allows the bunny to sit naturally and gives it the relaxed appearance
  shown in this style of design.
</p>

<div class="bunny-tip">
  <strong>Pro Tip:</strong>
  Make both legs at the same time, alternating between them every few
  rounds. This makes it easier to keep their length identical.
</div>
<h2>5. Add the Arms</h2>

<p>
  Keep the arms relatively slim so they match the proportions of the
  legs. Light stuffing near the hands is usually enough.
</p>

<p>
  Before sewing, pin both arms in place and check the bunny from the front
  and side. Small placement adjustments can dramatically improve the
  finished pose.
</p>
<h2>6. Embroider the Sleepy Bunny Face</h2>

<p>
  The embroidered closed eyes are one of the sweetest details of this
  bunny. Use black embroidery thread and create a gentle curved line for
  each eye.
</p>

<p>
  Keep both eyes at the same height and leave enough space between them
  so the expression doesn’t feel crowded.
</p>

<h3>Before You Embroider</h3>

<p>
  Mark the eye position with small pins first. Look at the face from a
  distance before committing to the final stitches.
</p>
<div class="bunny-small-title">
  BEGINNER TIPS
</div>

<h2>5 Common Mistakes to Avoid</h2>

<ol class="bunny-number-list">
  <li>
    <strong>Overstuffing the legs</strong><br>
    This can make the bunny look stiff instead of relaxed.
  </li>

  <li>
    <strong>Attaching the ears unevenly</strong><br>
    Always count stitches and pin both ears before sewing.
  </li>

  <li>
    <strong>Using loose crochet tension</strong><br>
    Loose stitches may allow the stuffing to become visible.
  </li>

  <li>
    <strong>Making one leg longer than the other</strong><br>
    Count your rounds carefully and compare both pieces regularly.
  </li>

  <li>
    <strong>Rushing the face embroidery</strong><br>
    The expression is one of the most noticeable parts of the finished bunny.
  </li>
</ol>
<h2>Ways to Customize Your Bunny</h2>

<p>
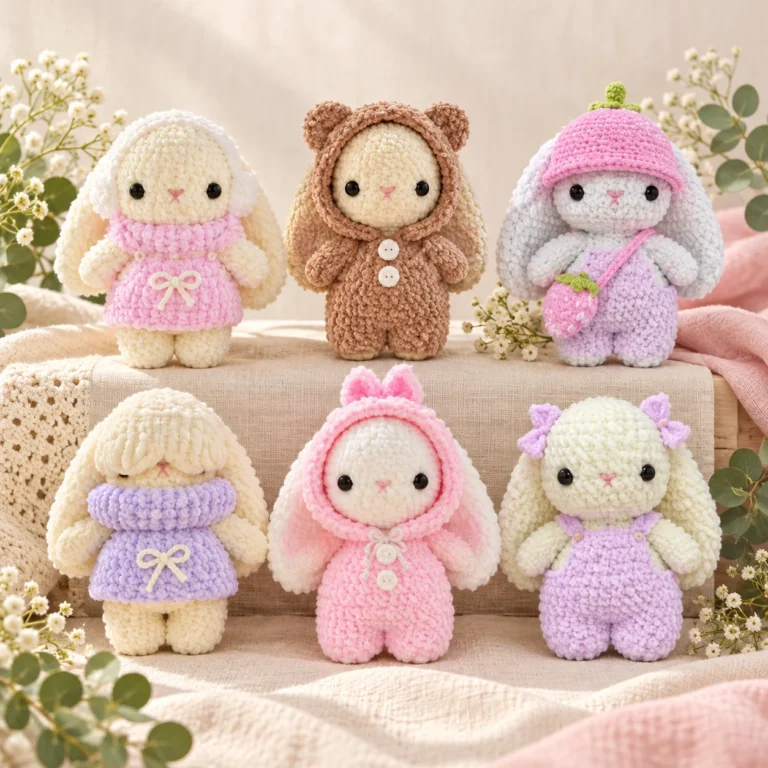
  Once you understand the basic construction, this bunny can be
  customized in dozens of ways.
</p>

<div class="bunny-idea-grid">

  <div>
    <strong>Pastel Bunny</strong>
    <span>Try pink, lavender, cream or sage green.</span>
  </div>

  <div>
    <strong>Striped Outfit</strong>
    <span>Alternate yarn colors while crocheting the body.</span>
  </div>

  <div>
    <strong>Tiny Scarf</strong>
    <span>Add a miniature crochet scarf for extra personality.</span>
  </div>

  <div>
    <strong>Different Expressions</strong>
    <span>Try open eyes, sleepy eyes or a tiny embroidered smile.</span>
  </div>

</div>
<div class="bunny-small-title">
  READY TO MAKE YOURS?
</div>

<h2>
  Crochet Your Own Long-Legged Bunny
</h2>

<p>
  Skip the guesswork and follow the complete project from the first
  magic ring to the final embroidery stitch.
</p>

<a href="#" class="bunny-guide-button">
  GET THE STEP-BY-STEP PDF GUIDE →
</a>
<h2>Keep Learning</h2>

<div class="bunny-related-links">
  <a href="/beginner-guides/">
    Amigurumi for Beginners →
  </a>

  <a href="/tutorials/">
    Browse Bunny Tutorials →
  </a>

  <a href="/bunny-ideas/">
    More Bunny Ideas →
  </a>
</div>

Leave a Reply

Your email address will not be published. Required fields are marked *