Halloween Ghost Crochet Pattern: Meet Three Little Spirits
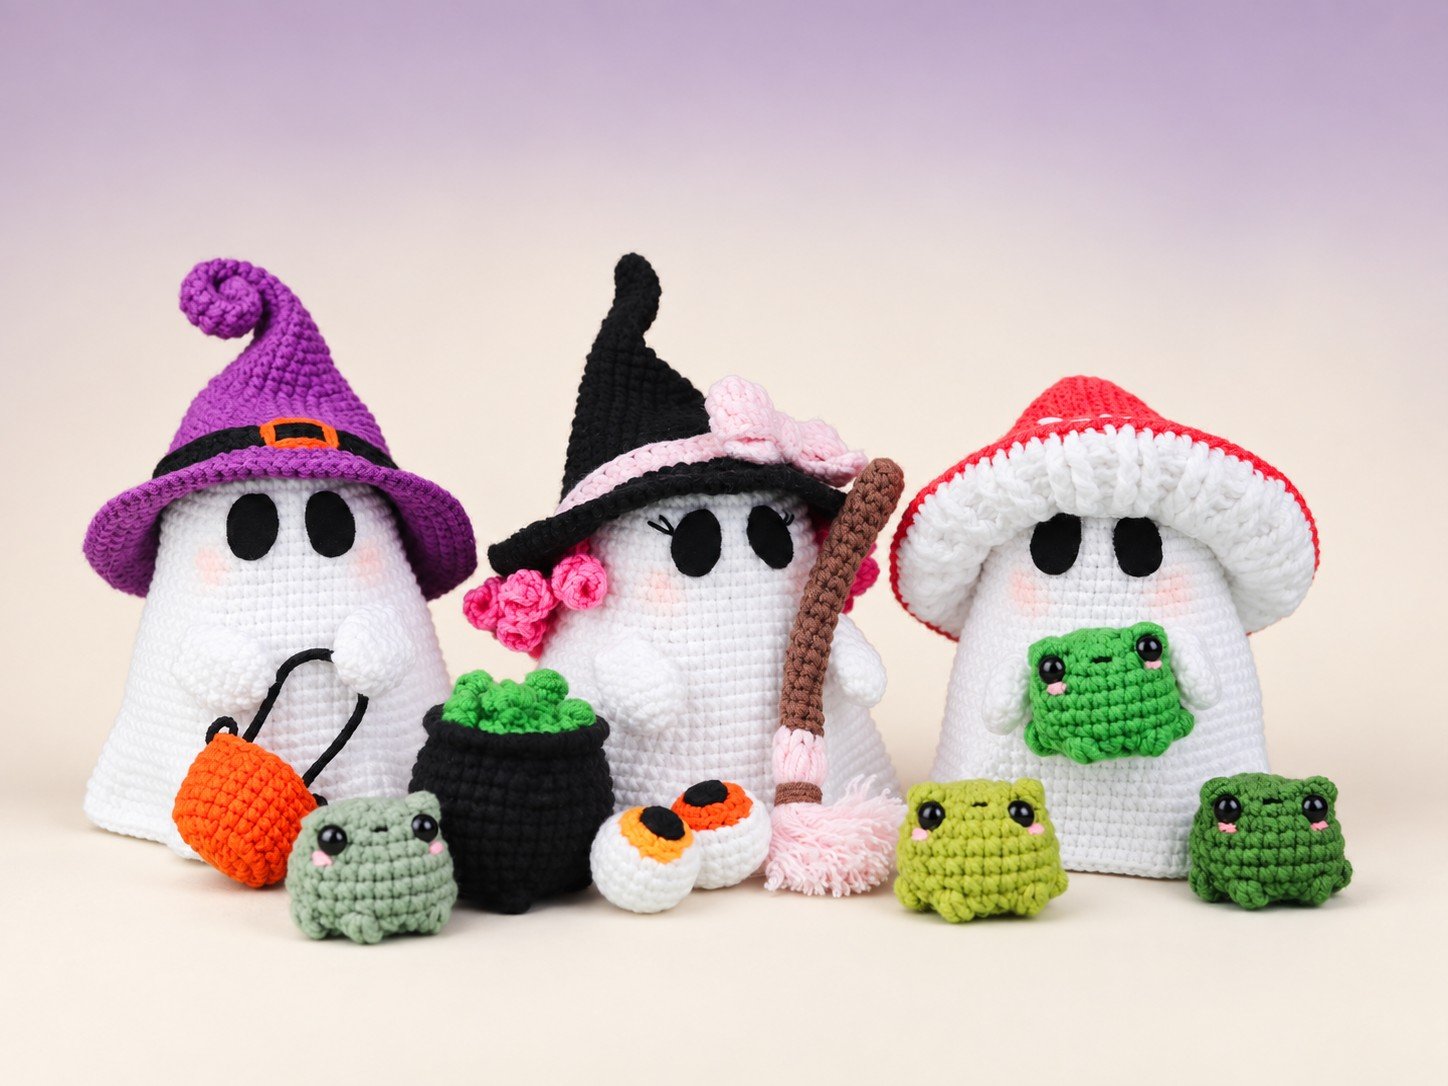
A Halloween ghost crochet pattern can be much more than a simple white shape with two eyes. Add a curling witch hat, a tiny pumpkin basket, or a mushroom cap, and that little ghost starts to feel like a character from its own autumn story.
The Little Halloween Ghosts PDF brings those details together in a collection of three dressed-up spirits with removable hats and cloaks.
This project is for crocheters who enjoy character building as much as stitching. There is a classic Halloween ghost carrying a pumpkin basket, a witch ghost with pink curls and magical accessories, and a mushroom ghost with a small green frog.
Their matching silhouettes make them look at home together, while their accessories give each one a different personality.
In this guide, you will discover what is inside the pattern, which materials it calls for, what skills to prepare, and how to plan a finished display. You will also find practical ideas for choosing colors, organizing the smaller pieces, and giving your handmade ghosts a polished finish.
Ready to explore the project? View the Little Halloween Ghosts crochet pattern PDF on Gumroad.
Pattern at a glance
Three coordinating characters, one playful collection.
Little Halloween Ghosts is a 19-page crochet PDF featuring three ghost characters and a selection of coordinating accessories. The supplied edition uses US crochet terminology and describes the difficulty as intermediate.
With the specified materials, the finished toy is approximately 15 cm tall, although your yarn, tension, and finishing choices can affect the final measurement.
One of the most interesting features is the layered construction. The design includes a ghost doll base and a separate cloak that creates the familiar floating-ghost appearance.
The hats and cloaks are removable, adding an extra dimension to the finished characters. Rather than relying only on a face to create personality, the collection uses clothing, color, and small props.
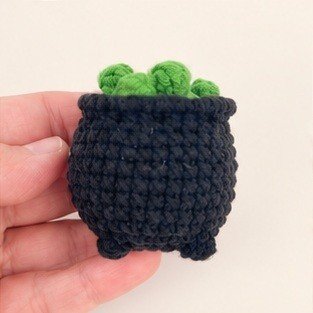
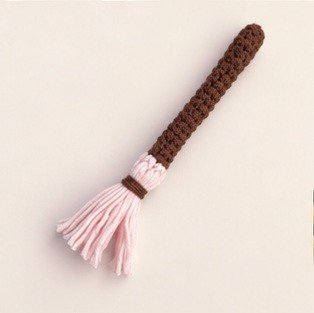
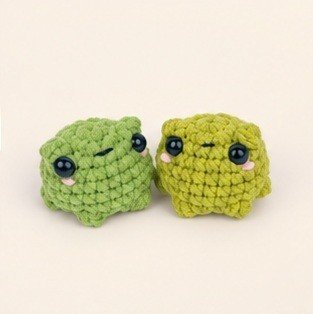
The PDF covers the base, cloak, hands, hats, and decorative pieces. Its accessory sections include a pumpkin basket, a cauldron with a bubbling potion, a broom, an eyeball, and a little frog.
Written instructions are accompanied by photographs showing parts of the making and assembly process.
This article is a project overview and preparation guide. For the actual round-by-round instructions, stitch counts, and assembly references, use the complete pattern PDF. Keeping the pattern beside your work is especially useful when moving between the different hats and small accessories.
Meet your three little spirits
Choose the outfit that makes you want to reach for your yarn.
The Ghost With a Pumpkin Basket
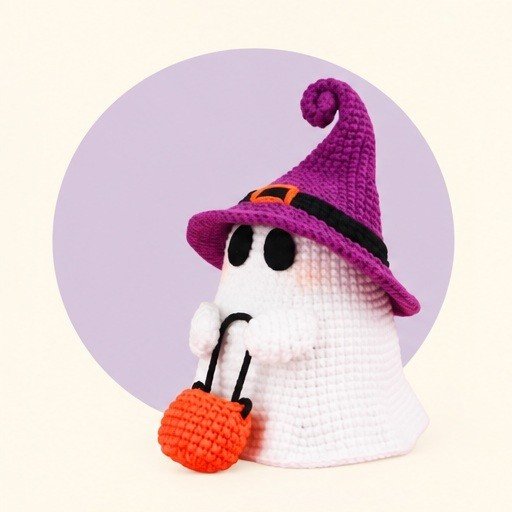
The pumpkin-basket ghost combines an off-white cloak with a purple witch hat and a bright orange basket. The hat has a curled tip, a dark band, and an orange buckle detail.
In the project photograph, that tall, twisting silhouette gives the character a playful look before you even notice the basket.
The orange accessory provides a strong focal point against the light cloak. It also repeats the warm color in the hat decoration, helping the outfit feel coordinated.
If your favorite Halloween palette includes purple, orange, black, and cream, this character is a natural place to begin.
For a display, imagine this ghost standing beside a stack of autumn books or a small decorative pumpkin. Keep the surrounding objects fairly simple so the curled hat and miniature basket remain easy to see.
The figure already has several distinct details, so it does not need a crowded background to make an impression.
The Witch Ghost With Pink Details
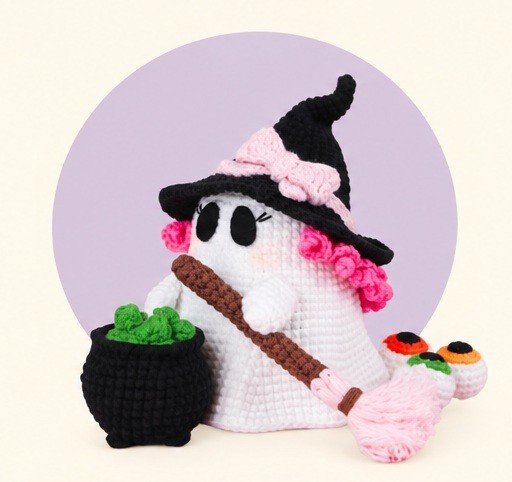
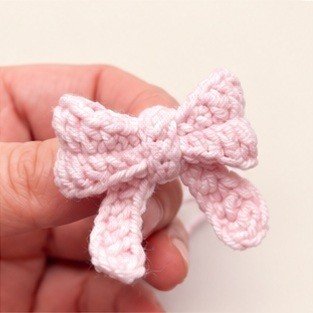
The witch ghost uses a different balance of colors and textures. Its black hat is decorated with a pale pink band and bow, while brighter pink curls frame the face.
A broom and a dark cauldron bring the magical theme together, and green potion bubbles add another small burst of color.
This is the character to consider if you enjoy making a collection of coordinated parts. The bow, curls, broom, and cauldron each contribute something different to the overall design.
Working on them separately can make the project feel like assembling a miniature costume rather than repeating the same shape throughout.
The contrast between the black hat and pink embellishments also makes this version useful for a softer Halloween arrangement. You can surround it with pale pumpkins, neutral fabric, or muted autumn colors while keeping the recognizable witch theme.
Let the pink details serve as the connecting color across the scene.
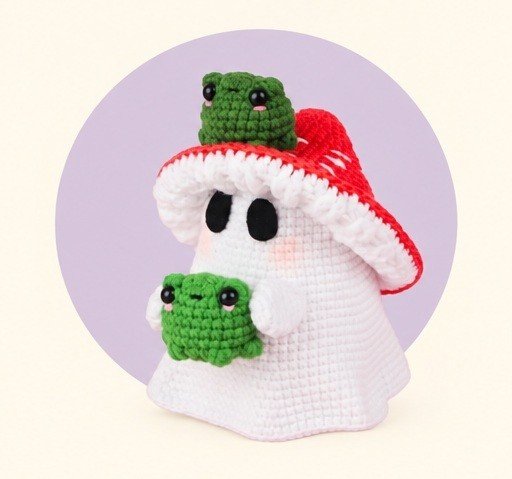
The Mushroom Ghost With a Frog
The mushroom ghost brings a woodland feeling to the collection. Its red cap has an off-white underside and pale decorative flecks, while a green frog adds a small companion.
The broad mushroom silhouette looks quite different from the pointed witch hats, even though the ghost underneath belongs to the same visual family.
If you enjoy woodland decorations, this variation offers an appealing way to connect a Halloween project with a forest-inspired setting. Red, cream, and green give you a clear color palette to repeat in nearby objects.
A wooden tray or a plain shelf can provide enough context without distracting from the crochet work.
The frog is also a useful visual counterpoint to the much larger cap. Its compact shape and contrasting green color draw the eye back toward the front of the ghost.
When arranging the finished character, keep that small accessory visible instead of hiding it behind other decorations.
Before you pick up your hook
Intermediate level • US crochet terms
The pattern is labeled intermediate, and that description is a better guide than the small size of the finished ghosts. A compact amigurumi project can still involve careful shaping, multiple components, color changes, and detailed assembly.
Here, the clothing and accessories add much of that extra work.
You should be comfortable reading a crochet pattern, counting stitches, and recognizing the beginning of a round. Familiarity with a magic ring, single crochet, increases, and decreases will help with the basic shapes.
The abbreviation list also includes half double crochet, double crochet, front-loop and back-loop work, bobble stitches, and front and back post double crochet.
You do not need to practice every technique in one sitting. Read through the section for your chosen character and identify anything unfamiliar before starting it.
A small practice piece is a useful place to try post stitches or a bobble without having to undo part of a nearly finished accessory.
If you have only made flat projects so far, begin with some practice in continuous rounds. Learn to move a stitch marker consistently and check a completed round against the pattern count.
Those habits make shaped pieces easier to follow and leave more attention available for the character details later.
For a refresher on the basic motions, visit our how to crochet for beginners guide before starting the shaped pieces.
Your materials checklist
Start with the yarn and hook, then gather the extras for your character.
- Sport cotton-blend yarn • 2 mm crochet hook
- Fiberfill • yarn needle • stitch markers
- Eyes, felt, and the extras for your chosen character
The supplied materials list specifies sport, 5-ply cotton-blend yarn with a stated length of 330 meters per 100 grams and a 2 mm crochet hook. It names shades from Alize Cotton Gold and YarnArt Jeans for the different characters.
Use that information as the starting point when planning your yarn selection.
The broader supply list includes fiberfill, 6 mm and 8 mm safety eyes, black felt, glue, a chenille stem, craft wire, round-nose pliers, pink pastel and a brush, a yarn needle, and sewing pins. Different elements serve different parts of the project, so read your chosen sections before assuming you need every item for one character.
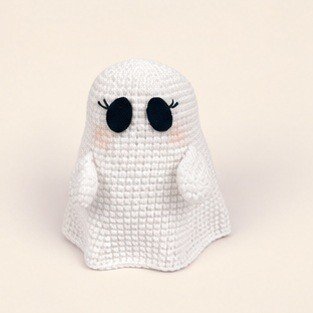
There are two facial constructions worth noticing. The underlying doll uses eyes fitted into the crochet fabric, while the outside cloak receives black felt eye shapes.
Understanding that distinction before you begin helps you organize the assembly stages and avoids confusing the face on the base with the face visible on the finished ghost.
Prepare a small tray for loose supplies and a separate container for finished crochet pieces. Thin wire, felt shapes, and small components are easy to lose in a yarn basket.
Having them arranged in advance makes the project easier to resume when you only have time for a short crafting session.
Choosing Yarn Substitutes Thoughtfully
If you substitute yarn, compare thickness and fabric behavior as well as the color name on the label. A much thicker yarn can change the size of the base, the drape of the cloak, and the fit of the hat.
The approximately 15 cm measurement belongs to the specified materials, not every possible substitution.
Try to keep the main body, cloak, and hat yarns similar in thickness unless you are deliberately experimenting. A heavy cloak over a much smaller base may not sit as intended.
Likewise, a stiff hat made from a very different yarn can produce a different silhouette from the project photographs.
Before committing to a full alternative palette, crochet a small sample and examine the stitches in ordinary light. Check whether the fabric looks even and whether the yarn separates easily as you work.
Choose a combination you can comfortably use across several small pieces, especially if you plan to make all three ghosts.
A simple project plan
One character at a time keeps the project manageable.
Start by choosing one character to complete first. Although the trio looks appealing together, beginning all the components at once can leave you with a confusing pile of similar pieces.
Finishing one ghost gives you a clearer sense of how the layers fit and how much attention the final details require.
Read the base and cloak sections, then review the accessories for your chosen version. Make a short checklist of parts rather than relying on memory.
For the witch ghost, for example, distinguish the hat decoration from the separate scene accessories so you can see what remains unfinished at a glance.
Divide the work into natural stages: structural pieces, outfit, small accessories, and final assembly. This is a planning method, not a replacement for the order specified in the pattern.
Whenever the instructions call for inserting eyes, adding support, or joining parts at a particular point, follow that sequence.
Keep a written note when you stop. Record the component name, the last completed round, and any temporary decisions such as a color substitution.
A few seconds of note-taking can save considerable recounting later, especially when you return to a small dark-colored piece after several days away.
Shape a neat base & cloak
A balanced base gives the removable cloak its shape.
The finished character depends on the relationship between the stuffed base and the outer cloak. The base provides structure, while the cloak establishes the floating silhouette.
Think about these as connected parts of the same shape rather than judging either one only while it lies flat on your work surface.
Use a stitch marker consistently when working in a spiral. Count at the points where the shaping changes, and check any unexpected widening or narrowing before continuing. Finding an extra stitch early is much easier than discovering it after adding the outfit and accessories.
Add stuffing gradually and distribute it around the shape. The pattern specifically draws attention to keeping the bottom piece flat during closure. If the base bulges underneath, pause and redistribute the filling instead of trying to correct the entire silhouette with the outer cloak.
When the relevant pieces are ready, check the cloak over the base before committing to the final decorative placement. View it from the front and sides.
The lower edge should contribute to the ghost shape, and the face should remain readable under the chosen hat.
Small adjustments are easier to judge with the whole character loosely assembled. Set the work down, look at it from a little farther away, and return to any uneven areas.
A close-up view helps with stitches, but a broader view helps you assess personality and balance.
Make the hats shine
Check the fit before adding the finishing details.
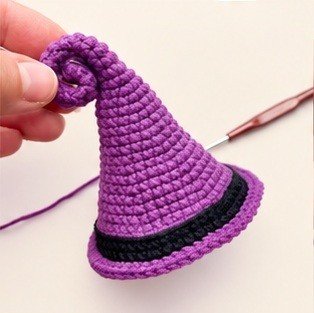
Each hat changes the outline of its ghost substantially. The twisted purple hat adds height and movement, the black witch hat frames the pink curls and bow, and the mushroom cap spreads outward.
This makes hat shaping an important part of the finished effect rather than a final decorative afterthought.
Before attaching decorative details, place the hat on the intended ghost and check its orientation. A bow that looks centered while the hat is flat may appear off-center once the brim sits at an angle.
The same principle applies to a buckle or mushroom flecks: evaluate them on the assembled form.
The original construction uses a chenille stem to help shape the curled hat. That supported curve is different from simply crocheting a soft cone and expecting it to hold a spiral.
Read the support instructions before reaching that stage so you have the relevant supplies ready.
Keep the removable feature in mind while finishing. Loose yarn ends, bulky interior knots, or misplaced embellishments can affect how easily an outfit sits over the base.
Check the fit gently, tidy the inside, and avoid adding unnecessary bulk where the hat meets the cloak.
Bring the accessories to life
Small props give each ghost its own personality.
The accessories tell you something about each character at a glance. A pumpkin basket suggests trick-or-treating, a broom and bubbling cauldron suggest a little witch, and a frog reinforces the mushroom ghost’s woodland character.
These details are what turn a set of similar white figures into three distinct subjects.
Work on small accessories when you can give them your attention. Their size does not necessarily make them the easiest parts: tiny openings, contrasting yarn changes, and finishing tails can all require patience.
Good lighting is particularly useful for the black cauldron and hat sections.
Keep the completed pieces together by character. A shallow box with separate compartments can hold a hat, its decorations, and the matching props until assembly.
If you are making multiple versions, add a paper label with the intended color combination so pieces do not accidentally become mixed.
For the final arrangement, decide which objects the ghost will hold and which will stand alongside it. Follow the pattern’s attachment guidance for held pieces. Before sewing permanently, check that the accessory faces forward and that the hands look balanced around it.
Choose your color story
Keep a shared neutral, then have fun with the accents.
The original colors already create three clear personalities, so they are a useful starting point for your first set. Off-white cloaks connect the characters visually, while purple, pink, red, orange, and green separate their outfits.
Keeping one shared neutral is a simple way to make several different costumes look coordinated.
For a softer interpretation, consider muted purple, dusty pink, cream, and sage accents. These are optional styling ideas rather than additional colorways documented in the PDF. Preserve enough contrast between the face, cloak, and hat to keep the small details visible.
For a more traditional Halloween arrangement, repeat orange and black across the surrounding display while allowing each ghost to retain its own hat. A common background can unite the trio without changing every yarn color.
This can be useful when you want to reproduce the photographed designs closely.
Before buying or selecting a full palette, lay the yarns together and take a quick photograph. A camera can help you notice when two shades blend together more than expected.
It is easier to replace one accent color at this stage than after completing an entire hat.
Style your Halloween scene
A simple backdrop lets the crochet work stand out.
Create a Small Shelf Scene
A shelf gives the ghosts a contained setting where their faces and accessories are easy to appreciate. Place the taller pointed hats toward the back and leave space around the wider mushroom cap.
Use a limited number of supporting objects so the crochet characters remain the focus of the arrangement.
Try one simple backdrop, such as a neutral book stack or a plain wooden board. The stitches already provide plenty of texture.
Too many patterned objects behind the ghosts can make the tiny facial details harder to notice, especially when the display is viewed from across a room.
Build a Seasonal Table Arrangement
A shallow tray can help organize a group of small figures and accessories on a table. Position the cauldron and basket where they are visible from the main viewing side.
Vary the placement slightly instead of putting every piece in a rigid line, while keeping the ghosts stable on their bases.
You can also make a single character the centerpiece of a smaller arrangement. The mushroom ghost works especially well as the subject of a woodland-themed scene, while the pumpkin-basket ghost carries an immediately recognizable Halloween color combination.
Choose the setting around the character you most want people to notice.
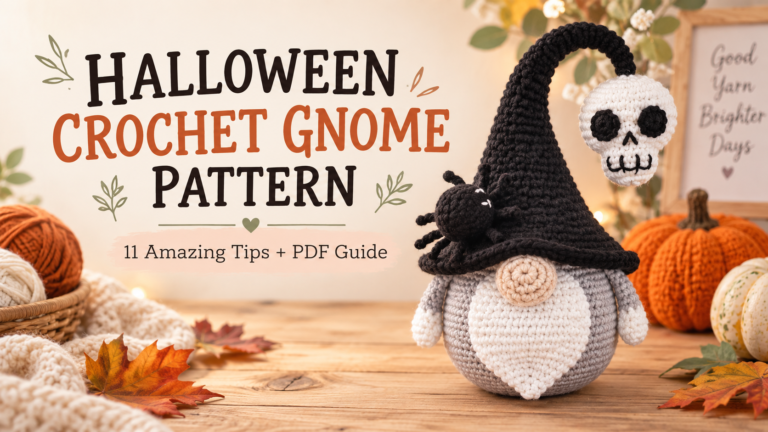
For another handmade character to include in the scene, explore our Halloween crochet gnome pattern guide.
Prepare a Handmade Gift Presentation
For a recipient who enjoys crochet or seasonal decor, include a short card explaining that the piece was handmade and naming the pattern designer. Package the hat so its shape is supported instead of pressed flat.
Keep separate accessories together in a small inner container so they remain easy to find when unpacking.
Photograph the little details
Show the whole character, then move in closer.
Choose a simple background that separates the off-white cloak from its surroundings. Pale beige, soft gray, or muted lavender can provide gentle contrast without competing with the hats.
Before taking a full set of photographs, check that the black eyes remain clearly visible in the lighting you have chosen.
Take a front view of each character and a wider photograph of the complete trio. Then add detail images of the features that distinguish them, such as the purple spiral, pink bow, or mushroom underside.
Those views tell a more complete story than several nearly identical photographs from the same angle.
Keep the camera near the character’s face level for at least one image. Looking down from a steep angle can hide the facial expression under a broad brim.
Move slightly to either side and check where the hat casts shadows before deciding on your main photograph.
If you share your own finished work, the supplied PDF asks for credit to the original pattern designer, chrochetbylove. It also lists the Amigurumi Bunny account associated with this edition.
A clear caption can describe your handmade piece while distinguishing your crochet work from the original pattern design.
Ready for the full pattern?
The PDF contains the complete stitch-by-stitch instructions.
This is a crochet pattern project, so you will be making the ghosts yourself. The linked product is presented here as a PDF pattern, not as a finished set of toys or a supply kit.
Plan to gather the yarn, hook, filling, and applicable accessory materials separately.
The supplied document gives an intermediate skill level, US terminology, and an approximate finished height. Those are useful details when deciding whether the project fits your experience.
Check the current Gumroad listing for purchasing information rather than relying on an old price or assuming particular checkout terms.
The source PDF also includes terms for selling finished items and crediting the designer. Consult that section directly if you intend to offer your completed ghosts for sale.
Keep the distinction between the written pattern and your finished crochet pieces clear when describing your work.
When you are ready to make the collection, get the Little Halloween Ghosts pattern PDF here. Having the full instructions and reference photographs together lets you move from this overview to the actual project without trying to reconstruct details from a finished picture.
Frequently asked questions
Tap a question to read the answer.
Is this Halloween ghost crochet pattern suitable for beginners?
The PDF identifies the project as intermediate. A beginner who is already comfortable with amigurumi basics may choose to build toward it, but the accessory work, shaping, and range of stitches deserve preparation. Review the techniques for your preferred character before deciding whether it is the right next project.
How big are the finished ghosts?
The supplied materials page states an approximate finished height of 15 cm with the specified materials. Treat that as a reference rather than an exact promise. Your yarn choice, hook, tension, stuffing, and the way you shape the outfit can all influence the finished appearance and dimensions.
Does the pattern use US or UK crochet terms?
The document uses US crochet terms. Check its abbreviation list before starting, especially if you usually follow UK patterns. Recognizing the terminology in advance helps prevent a stitch substitution that changes the height, texture, or proportions of a small component.
Are the hats and cloaks removable?
Yes. The supplied PDF explicitly describes the hats and cloaks as removable. The separate layers are a defining feature of the project. Follow the finishing instructions with that construction in mind, and check how the pieces sit together before completing decorative attachments.
What accessories are included in the guide?
The PDF contains sections for a pumpkin basket, witch hats, pink curls and a bow, a cauldron and potion details, a broom, an eyeball, a mushroom hat, and a frog. These pieces support the three character themes and offer several different shapes and finishing techniques within one collection.
Can I use a different yarn or a larger hook?
You can experiment, but a substitution changes the expected result. A thicker yarn or larger hook can produce a larger ghost and alter how the separate layers fit. Keep related pieces consistent, check the fabric as you go, and do not assume the original size will stay the same.
How long will the project take?
There is no single reliable completion time for every crocheter. Your experience, chosen character, and number of accessories will make a difference. Plan several manageable sessions and allow time for assembly, because positioning the face, fitting the outfit, and finishing small details are part of the project too.
Where can I find the complete instructions?
You can find the linked product on Amigurumi Bunny’s Little Halloween Ghosts Gumroad page. Use the complete PDF for stitch counts, construction sequences, and assembly photographs. This article introduces the project and helps you prepare; it does not contain the full crochet pattern.
Make your first little ghost
Pick your favorite, gather your supplies, and enjoy the details.
The appeal of these little ghosts is in the combination of a shared shape and very different outfits. One carries a bright pumpkin basket, one gathers witchy accessories around a pink-trimmed hat, and one brings a frog beneath a red mushroom cap.
Together, they give you a small handmade cast for an autumn display.
Choose the character you are most excited to make, gather its materials, and give yourself time to enjoy the finishing touches. The removable layers, expressive faces, and miniature props offer plenty to explore as you build the collection. Explore the Little Halloween Ghosts crochet PDF and start planning your first ghost.
Get the full Little Halloween Ghosts PDF for the complete pattern and assembly photos.
Get the crochet pattern →
One Comment
Comments are closed.